|
Engineering drawing is a type of technical drawing that has existed since ancient times. It is crucial to document and communicate your design intent, market your product and/or ensure seamless manufacturing. In this blog, we will discuss reasons why you should take your engineering drawings seriously. What is 2D Engineering Drawing?Engineering drawings are used by designers and engineers to communicate a 3D object by creating its 2D views. These drawings contain information regarding the geometry, dimensions, tolerances, and material of the object. 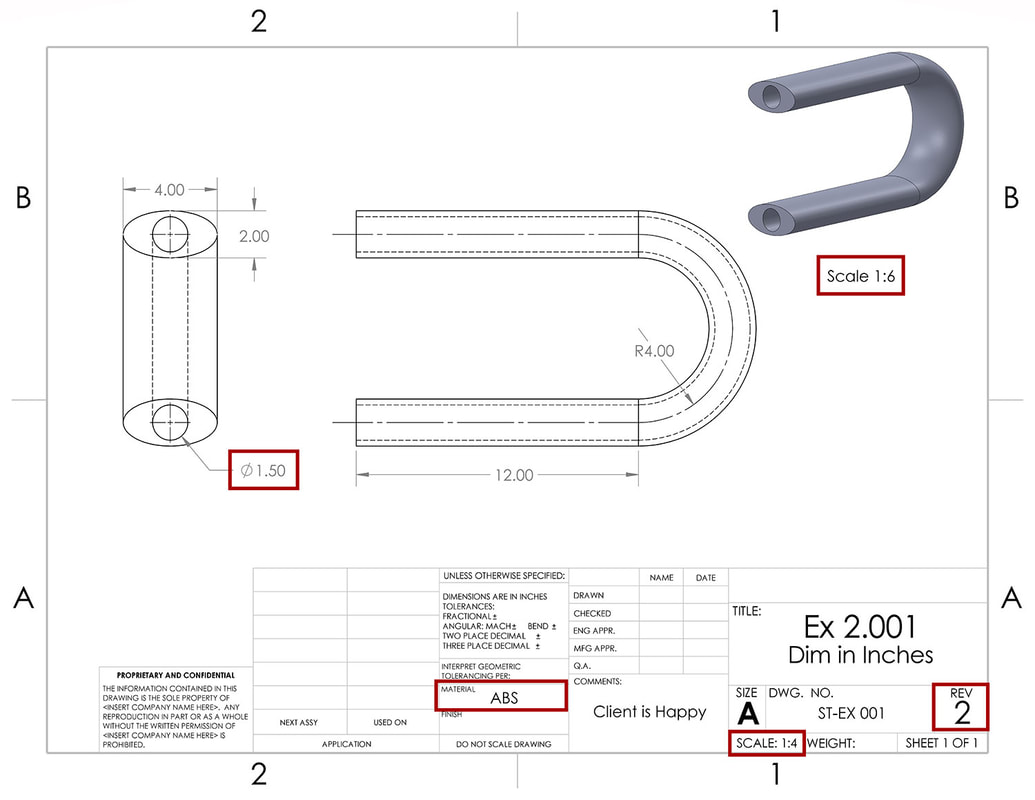 The standard orthographic projection of views shows how the object looks from the top, bottom, front, back, right, or left. These views are positioned relative to each other on the drawing sheet. Adding all orthographic views to the drawing is not necessary. You should have as many views as are sufficient to fully and clearly convey all the information. This might also mean using additional views to show further details. Additional views can include section views, break views, crop views, etc. Importance of Engineering DrawingYou may think that engineering drawing is a repetitive and boring process. However, overlooking it can cause more harm than good. Putting less effort into it may save time while creating them, but this might cause issues downstream like the following:
These issues will not only delay the project but can also leave a bad impression on your client. That is why engineering drawings should be given the importance they deserve. Creating Engineering Drawing using SOLIDWORKSSOLIDWORKS enables you to create quality engineering drawings from 3D models super easily. Your perfectly documented drawing is just a few clicks away. Simply go to File > Make Drawing from Part. Then select the sheet size you want, drag and drop the standard view orientations populated in the View Palette and create projected views relative to mouse movement. Model properties are automatically added to the information block, which can also be customized. You can adjust the drawing view scale, add dimensions, hole callouts, center-lines, and other annotations to communicate the drawings. You can also use the Model Items tool to add all the annotations in one go. Finally, export the drawing to suitable media e.g., PDF and/or .jpeg. The following gif shows the steps to start a drawing, add orthogonal views, and use the Model Items tool to auto-populate your dimensions.  A great feature of these drawings is that they update with the model. Any update to the model will be reflected in the drawing. How often do you use engineering drawings to communicate your models? Let us know in the comments. If you are looking to get a deep dive into the SOLIDWORKS drawing tools, you can check out the SOLIDWORKS Drawing Specialist training at the TforDesign School.  By Mohsina Zafar, Technical Lead at TforDesignMohsina is a Mechatronics engineer who is passionate about 3D design and artificial intelligence. She specializes in SOLIDWORKS 3D CAD and loves to help students solve their SOLIDWORKS problems.
linkedin:https://www.linkedin.com/in/mohsina-zafar/
7 Comments
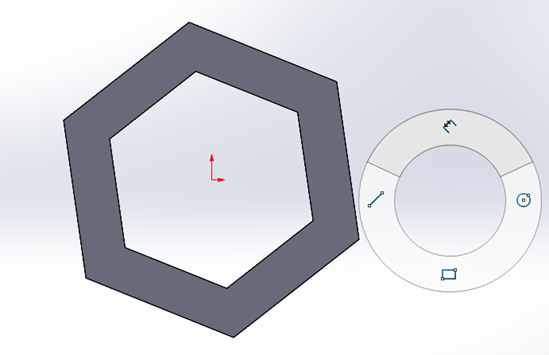
SOLIDWORKS has tons of different commands scattered around the interface. This makes shortcuts very valuable as they enable you to build models faster with less frustration. In this article, I will be exploring some of the key shortcuts that I found most useful during my SOLIDWORKS journey, from starting to learn the software till I became a certified SOLIDWORKS Professional (CSWP). Thus, if you are starting to learn SOLIDWORKS, the following seven shortcuts will give you the most value for your bucks. The short-cuts listed here are enabled by default in the software. However, you can adjust them as well if needed. 1. The “S” key for a little commands pop-up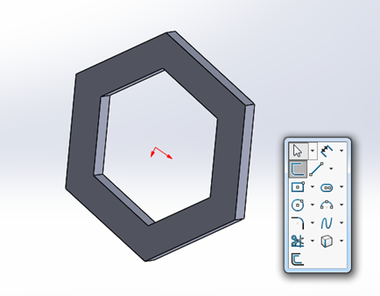 The “S-Key” is my favorite shortcut in SOLIDWORKS. By pressing the “S” key, you launch a customizable shortcut bar that brings a set of commands right to your mouse cursor. With this, you can quickly access dozens of commands. These shortcut commands vary depending on the modeling context – sketch, part, assembly, or drawing. With them at hand, you will not now move your mouse to the Commands Bar to search for commands. Instead, the commands will pop up right where your cursor is. This will save the mouse travel time and keep you focused on your design. The following screenshot shows the little commands pop-up. 2. The "A" key for quick type switchSometimes, you want to sketch a specific form, but you mistakenly chose another form. By pressing the "A” key, you will switch through the types. For example, you want to draw a Center Circle but accidentally selected the Perimeter Circle. With the “A” Key shortcut, you can quickly switch between those types and get the circle type you want. This works for all sketching commands with different types like rectangles, arcs, and slots 3. The "F" key to focus your modelThe “F” key will bring your model to focus. Often when being in the Part modeling or Assembly Modes, your part can get lost in the endless canvas. By pressing the “F” key, your model will get into focus again. The alternative would be to zoom in and out to find your model, which will take much valuable time. 4. The "Enter" key to repeat commandsBy pressing the “Enter” key, you will repeat the last command. For example, if you are drawing a line and want to draw another Line, you don’t need to go to the Line command again. Just press the "Enter” key, and you can repeat the Line command. 5. Mouse gestures for customized commands
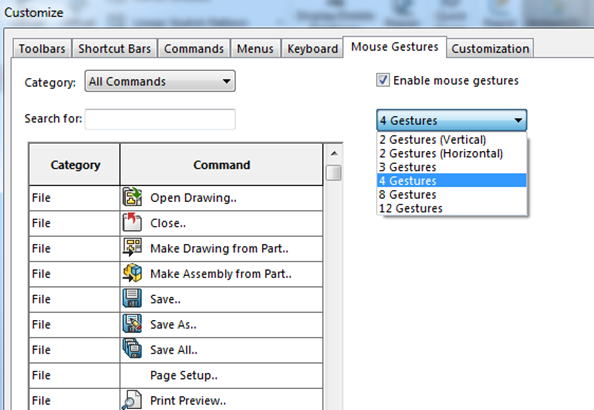
Press the right mouse button and move the mouse a little towards any direction to get a custom circular menu with different commands. By default, you will have four different commands. However, you can increase and customize them up to 12. The screenshot below shows how the basic four commands while working on a sketch. To add and customize the mouse gesture commands, go to Tools -> Customize -> Mouse gestures as shown in the screenshot below. They are context-oriented. Thus, you can have a different set of commands appearing if you work in a different mode, like in a sketch, part, assembly, or drawing. 6. The search commands tool The search commands Bar is a quick way to launch a command. During an exam or under stress, you often forget the place of a specific command and start searching for it, losing some valuable time and increasing your frustration. Alternatively, you can type its name in the search and launch it from the list of commands. You can find the search commands box on the top-right of the SOLIDWORKS interface. You can also use the shortcut “W” to access it instantly. 7. Ctrl and drag to create a new plane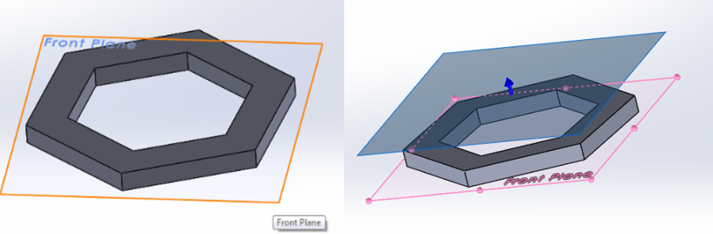 If you are creating a complex model in SOLIDWORKS, you will most likely need to generate additional reference planes to aid your design. Instead of looking up the reference plane command, you can select an existing plane, click and hold “Ctrl,” then drag the mouse. This will generate a parallel plane to the one you selected. You can then add in further adjustments to the new plane from the reference plane property manager. TakeawayIn this article, I talked about seven shortcuts that I find most helpful. It can seem difficult to deal with initially, but after getting used to it, one can’t renounce it. Shortcuts are easy, time-saving, make you more efficient, and are available for you. So, try to use them. If you are looking for comprehensive online SOLIDWORKS courses, make sure to check out the different offers at the TforDesign School.  By Ahmed Ben Lamine Ghouma, TforDesign Community MemberAhmed holds a Master's degree in Mechanical Engineering and aims to learn and improve constantly.
Linkedin: https://www.linkedin.com/in/ahmed-ben-lamine-ghouma/ The functionality to change the color of SOLIDWORKS icons and background was rolled back in 2016. When SOLIDWORKS introduced the new icon colors scheme to be more modern and more friendly for colorblind individuals. This significant enhancement was met with criticism upon its launch from the fans of the classic icons. However, the software allows the users to choose the interface according to their liking satisfying the different tastes. This post will explore the different interface options available in both icon color schemes and background modes. SOLIDWORKS Icon Color SchemesStarting with SOLIDWORKS icons, we can select either the old classic icons (green-yellow) or the new default ones (blue-white). Although both icon types are sleek, the classic scheme reminds us of the “classic” SOLIDWORKS era, whereas the default scheme has a more modern touch. The default scheme is also a great addition as it assists colorblind people in differentiating the icons. The following gif shows the difference between the classic and default icons. SOLIDWORKS Background ModesMoving on to SOLIDWORKS background. The dark mode is a huge relief for the eyes as it turns down screen intensity, and you do not feel like staring into a light bulb. In SOLIDWORKS, there are four shades of grey which change the entire interface except for the graphics area. The following gif can give you an idea of how the different backgrounds look like.  Choosing the InterfaceBoth the icon colors and background can be chosen by going to Tools > Options > System Options tab > Colors. The following gif highlights how you can adjust the icons and background.  What is your favorite combination of icon and background styles? Let us know in the comment. If you are looking to learn SOLIDWORKS with a bundle of learning support services, make sure to check out the TforDesign school online SOLIDWORKS courses.  By Mohsina Zafar, Technical Lead at TforDesignMohsina is a Mechatronics engineer who is passionate about 3D design and artificial intelligence. She specializes in SOLIDWORKS 3D CAD and loves to help students solve their SOLIDWORKS problems.
Linkedin: https://www.linkedin.com/in/mohsina-zafar/ In case you use SOLIDWORKS as a Design Tool and wonder what is new and worthy in SOLIDWORKS 2021, this article is for you. While SOLIDWORKS carries many updates every year for the software, those updates are spread out to many of the software’s functions and branches targeting different niche uses. Here we have summed up our favorite updates and the ones that will impact the most common users. We have also ordered them from most to least noticeable. 1. Redo Command One of the most delightful additions to SOLIDWORKS 2021 was the redo command. In SOLIDWORKS 2021, you can both undo and redo features, sketches, etc. Before this update, if you undid a feature, sketches, or any modification by mistake, you have to redo it all over again, taking a good chunk of unnecessary time. Luckily, not anymore. This is because the long overdue ‘redo’ is here. This new command works the exact same way as the redo command in Microsoft Word and other major software. 2. Custom Color Picker One of the common elements of any design is the colors. Pre SW 2021, there was a good selection of colors to select from. SW also enabled coloring with RGB and HSV values. However, in SOLIDWORKS 2021, they have added a Color Picker to make it easier to pick/copy colors even from outside the SW interface. This made it easier to pick colors from logos, sketches, or pictures. This makes it very easy to apply the exact colors given by clients. 3. Equations in the Custom File Properties With every SOLIDWORKS file, we can add custom properties that are linked to the file. Those can include info about the designers, company, materials, dates, etc. Those can then be auto-populated in the auto-produced bills of materials and various drawings annotations as needed. In SW 2021, equations are added to those custom properties. This opens the possibility of adding variable information to link to the file. For example, we can add an equation that calculates the cost based on the mass of the part, so when the design of the part changes, the cost will change automatically as well. Before 2021, we were able to add the cost as an independent number that could only be adjusted manually. Thus, the new equations function can add an element of robustness to our workflow. We talk about equations and how those can be auto-populated in the bill of materials in our Drawing Specialist course. 4. Save Interference Detection Results to Excel with Thumbnails The Interference Detection tool is one of the most commonly used evaluation tools within SOLIDWORKS assemblies. It enables us to evaluate the whole assembly by finding out if different parts might be interfering with each other (i.e., into each other). Once we have those identified, we can then adjust the design accordingly. In SOLIDWORKS 2021, we can now export those interferences to an Excel file along with a screenshot of each interference. In the case we have many interferences, this will make it more convenient to evaluate and look at all the instances. However, more importantly, it provides a method to easily share those instances with other designers on the team or with external entities (e.g., clients) that don’t have access to SOLIDWORKS. In both cases, those Excel sheets can be used to discuss any necessary adjustments. To know more about the interference detection functions and other advanced SOLIDWORKS tools, you can check out our SOLIDWORKS Professional-level Course. 5. Transparencies and Textures Export for 3D PrintingThis will only have to relate to you if capitalizing on colored 3D Printing. Specifically, when exporting your file using the format 3MF. In SOLIDWORKS 2021, we can export colors, textures, and transparencies in the 3MF file. Exporting with color was possible with older SOLIDWORKS versions like 2020. However, the 2021 enhancement included transparencies and textures as well. Keep in mind that you will only benefit from this when printing with Material Jetting colored 3D Printers that enable transparent and multi-textured 3D Printing in one part. Other than for 3D Printing applications, 3MF files are a binary 3D Model format that can be easily shared and opened with any 3D Viewer like the default 3D Viewer pre-installed Windows 10. To know more about this 3D Printing process and how 3D Printing, in general, can be of great value added to your work, check out our 3D Printing: Opportunities and Applications course. 6. Performance UpdatesSOLIDWORKS 2021 has come with multiple performance enhancements throughout. Demanding elements like opening large assemblies and switching between different big configurations is now faster than before. There is no precise data on how fast that could be. However, for most of those, you might only be able to notice a considerable difference when working with very large files, like an assembly or a drawing with 1000+ parts. The updates we explored here were for mechanical design and support functions. They were also the updates that will most likely impact you. There are other updates on other parts of the software involving elements like sheet metal, weldments, etc. This is in addition to updates that involve independent packages like SOLIDWORKS Composer and Visualize. If you would like to check out the details of all the updates, you can check out the SOLIDWORKS whats-new page explaining those. Which SOLIDWORKS Version Should I Use?For the vast majority of SOLIDWORKS users, it does not make much of a difference in which version you should use. This is especially the case if you are using the software for 3D Design. Because SOLIDWORKS is an expensive and heavily regulated software, the most practical answer is that you should use the SOLIDWORKS version you have access to. However, if you can choose which version you can access, then the newer the better. This is so you can get access to the latest features. Limits on Version Control/Working with Different VersionsOne of the most notable issues in using different SOLIDWORKS versions is your ability to interact with users with an older or newer version than the one you have. With a newer version, you will be able to open SOLIDWORKS files that were made using older versions. However, with an older version, you will not be able to open files made with the newer ones. You will most likely notice this if you share SW files with other users who are using another version. You might also come across this as an issue when downloading SOLIDWORKS models from sharing sites like GrabCAD. In that case, if the model you downloaded is made with a newer version than the one you have, you will not be able to open it. Suppose you are looking to learn SOLIDWORKS from scratch or looking to upskill your current SOLIDWORKS skills. In that case, you can check out the TforDesign online school which has many offers on SOLIDWORKS and related topics. Which SOLIDWORKS version are you using?  By Tayseer AlmattarTayseer is a passionate designer and educator. He believes that innovation potential can be grown and natured within organizations with relevant design innovation processes.
LinkedIn: https://www.linkedin.com/in/tayseer-almattar-design-innovation One of the most critical elements in designing intelligently in parametric modeling is considering Design Intent. So, what is Design Intent, and why is it important. We will talk about all that here in this post. In a nutshell, Design Intent is what you want your design to do. Maintaining your Design intent through the design means telling the software what you want the design to do or how it should behave. Another term often used for this is 'Modeling Intent'. Let us look at a simple example. We were given a 100 x 50 mm rectangular disk and asked to make a 25 mm diameter hole through it. 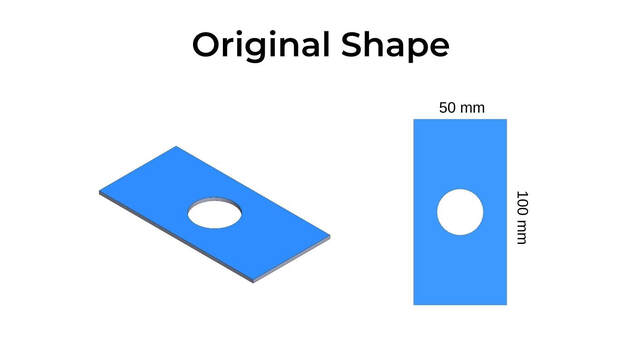 Here are four different ways to position the center of the hole.
Even though the result is the same, each of the instructions asks the design to behave differently. This will show when trying to modify the design. Let us assume that we were requested to change the rectangle's longer side from 100 mm to 200 mm and the smaller side from 50 to 100 mm. Let us make this change and see the result have we followed each of the given instructions. The figure below shows the result. 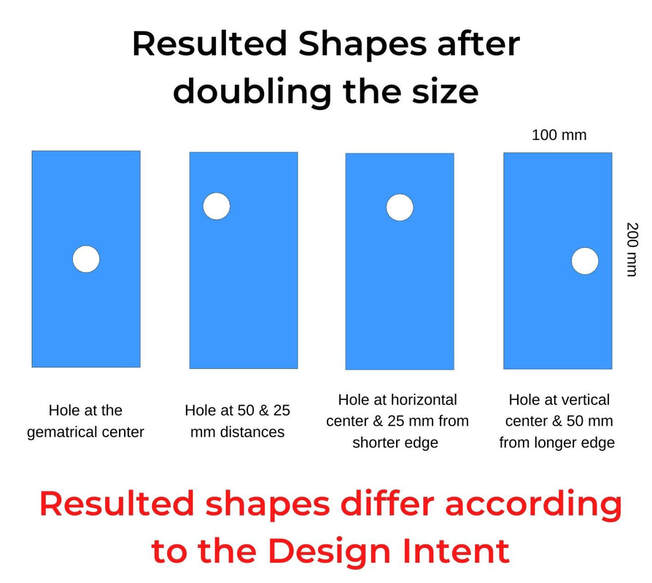 From the results, the difference is quite notable. Note that none of the designs are wrong. It is just that each has behaved differently according to what we told the software what is important to us. In other words, the design acted according to our Design Intent. Considering and applying your design intent in your 3D modeling procedure takes more time and effort at the beginning. However, it saves lots of time at later stages when applying modifications to your design. Mostly talking, you will be continuously modifying your designs throughout the development cycle, making considering and impeding the Design Intent in your 3D models essential. Where does Design Intent Apply when 3D Modeling?The simple example explored earlier was in a sketch and an overall simple part. However, the same applies to applying features, making assemblies, and generating drawings. The more complex your designs are, the more critical it is to maintain your design intent throughout. 3D Modeling tools like SOLIDWORKS and others have many different tools to help you maintain your design intents. Major ones include Equations, In-context Features, and multi-body modeling approach. Other than Saving Time, Why Implement Design Intent?Maintaining Design Intents makes it easier for more than one person to work on the same design. This is because all involved persons would have a clear idea of what the design should do. Thus, when one person modifies another's design, they would know how the design should behave and continue to maintain that desired behavior. Let us summarize the key points in design intent:
If you are looking to learn SOLIDWORKS from experienced users, you can check out the TforDesign online school for professional courses with learner support.  By Tayseer Almattar, TforDesign FounderTayseer is the founder of TforDesign. He has a passion for learning design and making all learning digestible and exciting.
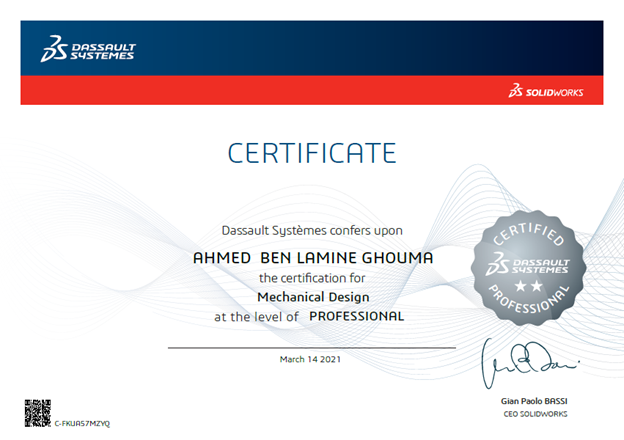
LinkedIn: https://www.linkedin.com/in/tayseer-almattar-design-innovation In a previous blog post, we talked about whether an official SOLIDWORKS certification is worth the investment. Assuming you decided to invest the money and took the time to learn and practice, and you are ready to take one of the official SOLIDWORKS certification exams. Here are some tips and notes that you have to keep in mind when sitting for the exam. 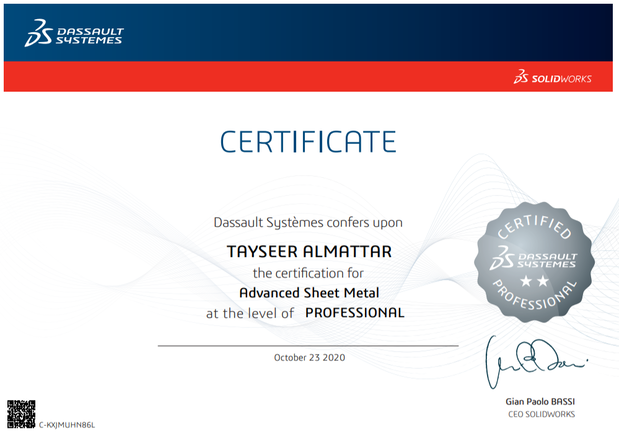 An Official SOLIDWORKS Sheet Metal Certification
If you are looking for steamed online courses in SOLIDWORKS and some practice exams, you can check out the TforDesign School.  By Tayseer Almattar, TforDesign FounderTayseer is the founder of TforDesign. He has a passion for learning design and making all learning digestible and exciting.
LinkedIn: https://www.linkedin.com/in/tayseer-almattar-design-innovation If I am to guess, you have most definitely heard the term 3D Printing before. So, let us dig deeper into it. 3D Printing falls under the broader term Additive Manufacturing (AM). More specifically, the term 3D Printing is more commonly used to describe entry-level technologies that are low in cost and accessible to the average consumer. Hence, the term became more known to people outside that specific technical sphere. However, for our purposes, we can consider them interchangeable. The term Additive Manufacturing only makes sense when contrasted with its more traditional counterpart Subtractive Manufacturing. In Subtractive Manufacturing, you start with lots of material; then, you remove from it until you reach your final product. For example, you can start with an aluminum block, then use a CNC machine to remove material to get a laptop chassis. Or you can start with sheet metal, then cut and form it to end up with a support bracket. In contrast, in Additive Manufacturing (AM), you would start from an empty canvas, and then start adding materials to end up with your final product. For example, you would start from a blank canvas, then add layers to end up with a laptop chassis, a support bracket, or a turbine blade. About the TechAdditive manufacturing has reached a good level of maturity with a wide variety of technologies. However, most of the technologies are more common for industrial use due to the machines' high cost and the required space, maintenance, and expertise to operate them. However, they mostly work using the same concept by adding layers of materials and solidifying them into a final shape. Materials can range from plastics, metals, paper, wax, sand, and composites. The following picture shows a 3D-printed metal impeller.  3D printed metal impeller The technologies that made it to consumer levels are:
The rest have mostly remained confined to industrial use. The following figure highlights the different 3D printing technologies currently available. Pictures and red rectangles are for technologies that are more available at the consumer level. 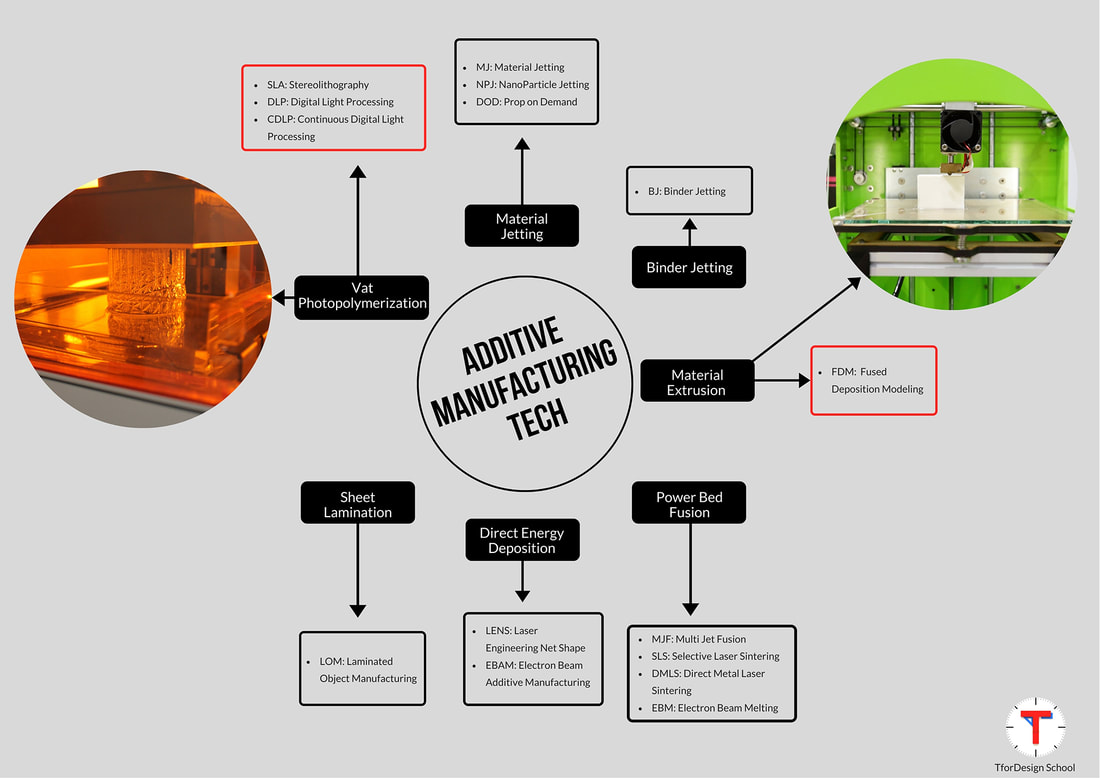 Map of the current AM technologies Why use Additive Manufacturing (AM) in Product DesignAs of now, Product Design applications represent the most prominent usage of Additive Manufacturing. This is both in the Product Development Stage as well as the Product Production Stage. Let us talk briefly about those two stages. Product Development Stage:Within the product development stage, AM has three main advantages:
Product Production Stage:The advantages AM brings for the product development cycle are more known and utilized than the Production Stage. In the Product Development stage, AM has two main advantages. Being able to produce custom products and complex geometries. 1. Custom ProductsAM enables you to produce unique, custom products on a small scale. For plastic-based applications, Injection Molding is the traditional counterpart for Additive Manufacturing. Both methods can produce plastic products, but the cost models are very different. The figure below highlights the difference in cost between Additive Manufacturing and Injection Molding. Additive manufacturing has a fixed cost per unit, while injection molding has a variant one that decreases the more you produce a product. This makes additive manufacturing great for creating custom products on a smaller scale. 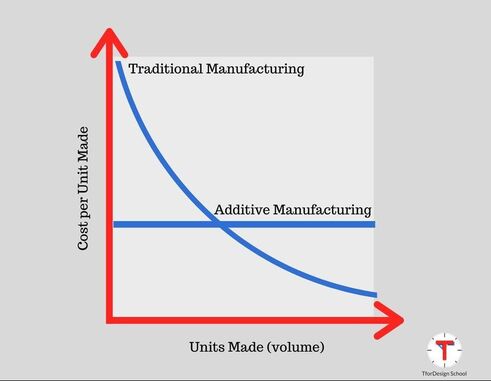 Cost for traditional injection molding vs AM 2. Complex GeometriesAM enables you to produce products that are not possible by traditional methods. This can be especially the case with metal products where the traditional counterpart is Subtractive Manufacturing. Due to its nature, AM technologies can enable the creation of internal structures that are otherwise impossible to make with traditional methods. The figure highlights a part structure that is only possible with Additive Manufacturing. 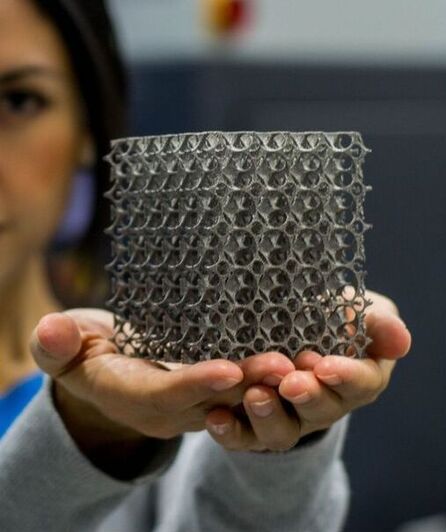 AM enable the production of complex geometries The scope of AM is much wider than what is described in this article. Besides the direct product design applications, AM can bring lots of unique advantages to other technical areas like supply chain and tooling. So, regardless of which area you are working in, you should keep an eye on AM and ways it can support your business. Have you ever used AM/3D Printing before? What did you use it for? Share your experience with us in the comments. Also, what else would you like to know about the world of Additive Manufacturing? If you enjoyed this article, do not forget to share it with your networks. *If you are looking to learn 3D modeling for 3D Printing, check out the TforDesign school, which offers a range of online 3D modeling courses on SOLIDWORKS, portfolio building, and sustainability.  By Tayseer Almattar, TforDesign FounderTayseer is the founder of TforDesign. He has a passion for learning design and making all learning digestible and exciting.
LinkedIn:https://www.linkedin.com/in/tayseer-almattar-design-innovation Multibody parts are solid bodies that can be manipulated in the same ways as a single solid body part. In essence, a multibody part is a part that utilizes a past file format (SLDPRT) but has more than one separate body. 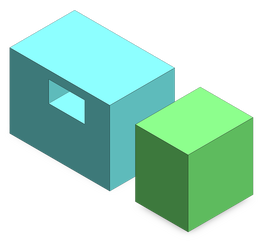 You can modify and add different features or change the names, materials, and appearances of each separate body. You can also hide and show different bodies, and believe it or not, mates can be used in a multibody part as well! However, multibody parts should not replace the proper use of assemblies. So, why even bother to use multibody parts? What are the advantages of this feature?
If in your part document are more than one separate body, you will find them under the Solid Bodies folder on the upper part of the design tree. This will give you more freedom in organizing and managing your designs. How to generate multibody parts?Technically, multibody parts are applied by default every time you have two bodies that are not touching. Here is a video demo of how multibody parts work. What else is great about Multibody Parts? You can apply mates!!! Angle, Parallel, Coincident, Perpendicular, Concentric, Tangent, and Distance are supported. This gives you flexibility since multiple sets of mates can be applied to the same body, similar to assemblies. With multibody parts, those mates or movements come under the Move/Copy Bodies command. What is the main difference between Multibody Parts and Assemblies?The multiple solids that compose a multibody part are not dynamic. If you have to use tools like Collision Detection, Dynamic Clearance, or Move Component, you have to use an assembly because these tools are only available within Assembly. The great thing is that you can save an Assembly (or subassembly) as a Multibody Part! When you have to communicate complex assemblies, you may consider saving them as a Multibody Part because:
Next time when you deliver a simplified representation of your work, give this feature a try! What are other reasons for using multibody parts? If you are looking for comprehensive SOLIDWORKS online training, you can check out the TforDesign School SOLIDWORKS courses.  By Tirdea Alina, TforDesign Community MemberAlina is a highly detail-oriented person who is striving to get the best outcome of any situation or task. She likes to put accent on quality over quantity while being aware of the work volume. Nevertheless, she is very methodical organized, respecting tasks and deadlines.
LinkedIn: https://www.linkedin.com/in/alina-chipaila  SOLIDWORKS currently has more than 3.2 million users at the moment, which is a large number. With such a large number of people, it is becoming less significant just to list SOLIDWORKS in our resumes. Instead, it is becoming more important to show what we can do with it and what we have done with it in addition to all the other skills we have. What is the best way to show all that? One great way to show one’s skills is through a work portfolio. So, what is a work portfolio, why have one, and what can you include in it? Let us explore those. What is a work portfolio?A work portfolio is a selection of work cases that you put together to prove your expertise. Why have a portfolio?The main reason to have one is it acts as solid proof of your capabilities. Without one, you will only be telling your audience about your skills without any proof. The power of a work portfolio is supplemented by a new push to emphasize skills in hiring procedures over only degrees. We made a video on The Case for Skills – Do University Degrees Matter. What can you include in your SOLIDWORKS Portfolio?If SOLIDWORKS is a major skill you would like to prove, then there are elements that you can include in your portfolio:
Different SOLIDWORKS modelsSince SOLIDWORKS is a 3D modeling software, a major expectation is having actual 3D models you created. Those could be ones you made for a job, an internship, a university, or a side fun model. Those can tell your audience that you know how to use the software. The more complex your models are, the higher your competency level.  Additional engineering and design skillsKeep in mind that SOLIDWORKS is a tool that supplements and can be supplemented by other different skills and attributes. You will need to identify those and include them in your portfolio. For example, if you are looking to work in areas of structural engineering, then the application of FEA analysis can be a good addition to your portfolio. If you are a product designer, then sketches and different design processes can be valuable. To identify those additions, you must first understand your audience and find what skills would be helpful to them. If you are looking to have a comprehensive course to teach you all about building portfolios, you can check out our new Complete Work Portfolio Building Course.  By Tayseer Almattar, TforDesign FounderTayseer is the founder of TforDesign. He has a passion for learning design and making all learning digestible and exciting.
LinkedIn: https://www.linkedin.com/in/tayseer-almattar-design-innovation One way to learn SOLIDWORKS is not just about modeling machines and projects but also about using the tool to generate creative models to push your thinking and modeling ability further in unique ways. So, here is one opportunity for you to learn SOLIDWORKS by 3D modeling Project X – contest. The Call: Calling all 3D modeling enthusiasts, this is Project X, a collection of ideas for modeling and applying 3D skills, all while encouraging you to use your most inestimable tool, your own imagination, and your sense of competition.  What is Project X?Project X is an open contest for 3D modeling enthusiasts to model their unique version of X. It is also a step-by-step booklet that guides you to build your own special character ‘X’. All works are shared publicly on Instagram. When does the contest start and end?The contest is open for everyone to join starting August 17th till September 6th, 2020. Who is ‘X’?Think about a tiny itty-bitty body that was turned from real to virtual! No possibility to interact with his beloved family, no chance to meet his dear friends, totally hopeless. S/He cannot be seen or heard because it's part of a virtual world now. To get him/her back to the real world s/he needs your help!
What you can do?You can help ‘X’ to find his family and friends by turning him back to reality. How? Being receptive to his inquiries and needs to overcome this unknown situation by using your 3D modeling skills! S/he might need a secret tool, a lucky hat, or a new appearance to become real again, who knows?! Explore our modeling ideas and hints across the Project X booklet that will be sure to inspire your own creation! Unlock your imagination and become a master of turning X into reality!  The booklet will provide you with parts and 2D engineering drawings of Project X, stages, and hits for generating each part of Project X, and info about changing appearance and renderings. We will help you to adjust the appearance of your own Project X, to create renderings using Photo View 360 in SOLIDWORKS, to adjust the size and quality of your render, and to save your rendering as JPEG or PNG in order to be able to present your work! At the end of this journey, we have a challenge for you: to make the most unique Project X out there and you will be rewarded! Join the fun now! Find more information about participating in the Project X contest and download your guide.  By Tirdea Alina, TforDesign Community MemberAlina is a highly detail-oriented person who is striving to get the best outcome of any situation or task. She likes to put accent on quality over quantity while being aware of the work volume. Nevertheless, she is very methodical organized, respecting tasks and deadlines.
LinkedIn: https://www.linkedin.com/in/alina-chipaila You already know how to use SOLIDWORKS to generate 3D models. However, what do you want to achieve with this new knowledge? Do you want to earn money, get a job or do you just need to pass an exam? If you are looking to earn money as an independent user, this article is for you.  The basic knowledge of SOLIDWORKS implies that you know how to use every tool from Sketch and Feature menu (defaults or basic adjustment) and how to move from Part to Assembly and Drawings module. If you already know this, CONGRATULATION, you can start to make money as a freelancer! There are so many platforms where you can make your profile and offer your knowledge (Upwork, Fiverr, Freelancer, Workana, PeoplePerHour…). Or you can build the models and sell them (Turbosquid...). After that, it is good to spend some time thinking about what you really like to model. Do you have an idea of what industry you'll be freelancing for? There are huge differences in standards and requirements between fields. When you apply on freelance websites, you can search for existing jobs or you can create your profile as an offer profile. In both cases, you need to write your real skills and competencies. It is okay if you do not know everything from the start, but you need to know where to look for whatever information you are missing. If you are sure about 70% that you are capable of finishing the job, apply for it! Try Google search to see what is on-demand and what you like or have to offer. Making money as a freelancer is not a quick process. It takes time to prove your skills and be able to attract clients. For a start, you will need to build your portfolio and identify the skills you have. Here's a way to get started. Create one folder with all models and drawings that you already made in SOLIDWORKS. Then, start a document listing all the features and tools that you think you know (use models and drawings that are already in the folder as a reference). Besides every feature and tool, write how confident you are with it. Do you know the basic application or advanced level application? This will help you clearly identify your SOLIDWORKS competencies which you can use as a foundation for which freelance job to apply for. If you have a certificate like CSWA or CSWP, then your hour can be more expensive as clients will have more confidence in your skills. Also, certifications look great in your CV. In addition to official certifications, every course that you pass is also a great way to show a potential client that you have a will to constantly update yourself and your knowledge. Doing freelance work will not only earn you money, but it will also help strengthen your design skills and help you build a strong personal portfolio. If you are looking for courses to grow your SOLIDWORKS skills, you can check out the course collections offered by TforDesign’s School.  By Ivana Medojevic, M.Sc. TforDesign Community MemberA multitasking mom with a big entrepreneurial dream. Reading, writing, and online learning are my passions. Soon Ph.D. in Mechanical Engineering.
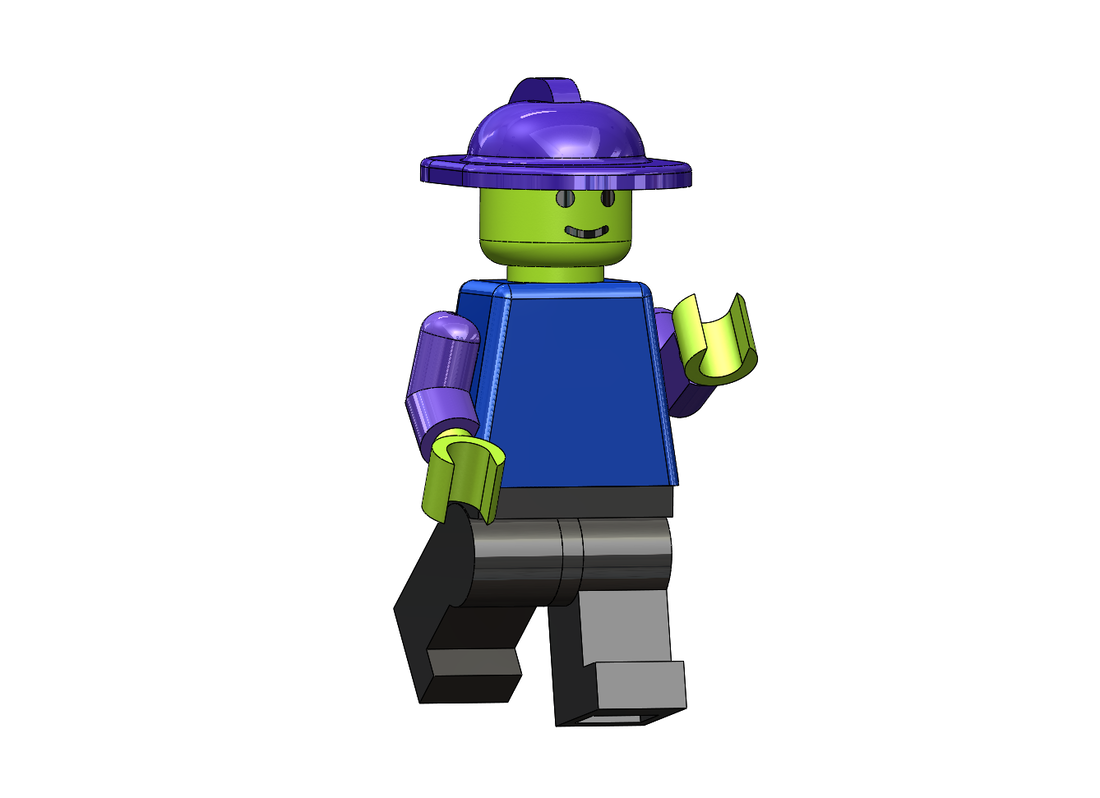
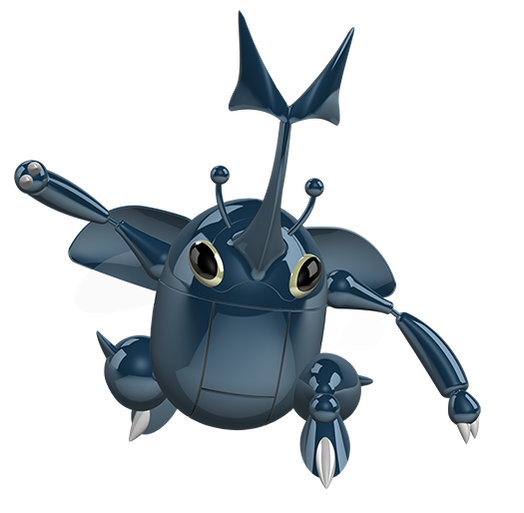
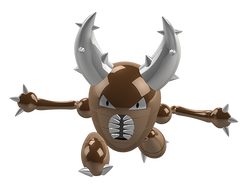
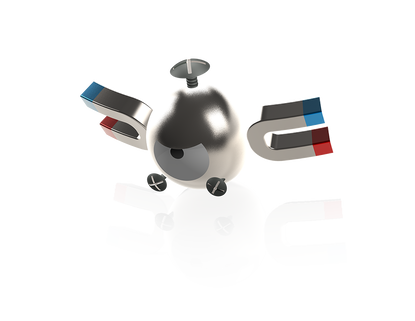
LINKEDIN: https://www.linkedin.com/in/ivana-medojevic/ SOLIDWORKS is famous for being an engineering software. We mostly use it to model or design machines, tools, and consumer products. However, as creative beings, we naturally like to push boundaries, which includes using tools for unintended purposes. So, the question is, can we 3D model animated characters in SOLIDWORKS? Think about Pokemon, Disney characters, Marvel characters, etc. This is the question we are addressing here. A simple answer is yes, it might not be your best option if you are planning to build a career in character animation or aiming to build an attractive portfolio as a hardcore engineer. However, if you are a SOLIDWORKS user, creating characters using a conventional engineering software can be cool and exotic but not an easy task as it has some unique modeling challenges. Here is a peek of some of the models I got to create:
Why should you use SOLIDWORKS for animated characters?The simple answer is: it is a great way to motivate and challenge yourself and up your learning. Let me explain further, how many times did you start a hobby to fill your time or start to learn something to upskill yourself? How difficult was it for you to get started and how easy was it for you to quit? Many of us nowadays lack incentives. Even though we all know that to get good at something we need to invest some serious amount of time. Thus, continuous motivation is a necessity for active deep learning. By now, you have already started upskilling yourself in SOLIDWORKS, as you are getting better at it, it becomes harder to learn new related skills. On one side, many projects on the internet are redundant and can make you feel discouraged to tackle them. On the other hand, your internal feeling of reaching a peak makes learning seem tedious. This is where creating something unconventional starts adding notable learning value. By modeling something fun like an animated character you are familiar with, you will surely become self-driving to reach that goal. You will find yourself searching for knowledge in different SOLIDWORKS communities, reading posts by experienced users, and continuously looking for clues to help you create your character. As it is an unconventional SOLIDWORKS task, you will be carving your own discovery path by testing and adapting different modeling approaches toward reaching a model that earns you some bragging rights.
What approach should you take to model characters?There are two approaches that you can take to make models like the ones shown above:
If you are equally familiar with both approaches, you will probably keep mixing them all the time. Regardless, one thing to keep in mind, is that character is more about shape than precise measurements making it a process of trial and error. To sum up, being a SOLIDWORKS user you will see your skills hitting a plateau but do not let short-term thinking affect your long-term learning process. Find something unconventional to model and challenge yourself on a journey towards that.  To get a little taste of what it feels like to model characters in SOLIDWORKS, you can check out this free Model Pokemon using SOLIDWORKS course which will take you through the journey of modeling some Pokemon. P.S. The course is FREE.  By Theodoros Leftheris, 'Model Pokemon using SOLIDWORKS' course instructorTheodoros is a passionate SOLIDWORKS user. As a member of TforDesign he designs models for educational purposes to stimulate the students into their SOLIDWORKS experience.
LINKEDIN: https://www.linkedin.com/in/theodoros-leftheris-632b79189/ Are you new to computer-aided design? Do you want to try out something different? Or do you think to shift to SOLIDWORKS? Despite the reason, if you want to get started with SOLIDWORKS here is what you need to know about the costs! Is SOLIDWORKS free?There are not many free options to get SOLIDWORKS. If you are a student, Dassault Systèmes offers you a student version that can cost about $150. More than that, some universities may have a limited number of Student Access licenses that you can take advantage of for free. A free trial is a wonderful option if you want to test the software! In this case, you can apply for up to 30 days and try all of the software functions and features or you can apply for the online version just in case you don`t want to install all the components on your computer. You must keep in mind that the SOLIDWORKS free trial is not synonymous with the SOLIDWORKS license. Licenses may not be free. What are the other benefits that SOLIDWORKS offers me?With a subscription-based license, you can get continuous upgrades, technical support, new versions, and free certification exam vouchers. However, It is not mandatory; you can buy a license without a subscription. How much I would pay to buy SOLIDWORKS?In accordance with the type of package you seek to buy, there are different prices. SOLIDWORKS Standard costs $3,995, SOLIDWORKS Professional costs $5,490 and SOLIDWORKS Premium costs $7,995 [1]. It may be some flexible options and discounts based on your position, including the fact that you are a beginner, or you work for a big company which may pay for you. Also, the prices and offers can vary according to your local reseller, so make sure to find and get in touch with them for the purchase! What if I bought a license and I want to use SOLIDWORKS online?If you already have a license you can convert it from a “standalone license” to an “online license” and is supported by 2018 and later versions. Why would you do such a thing? That`s simple: with an online license, you can switch between many computers without activating and deactivating licenses. If you are looking for an affordable non-commercial license, check out our How to Get an Affordable SOLIDWORKS License purr. [1] “SOLIDWORKS Standard - Computer Aided Technology (CATI).” https://www.cati.com/3d-cad/SOLIDWORKS-3d-cad/SOLIDWORKS-standard/ (accessed May 27, 2020).  By Tirdea Alina, TforDesign Community MemberAlina is a highly detail-oriented person who is striving to get the best outcome of any situation or task. She likes to put accent on quality over quantity while being aware of the work volume. Nevertheless, she is very methodical organized, respecting tasks and deadlines.
LinkedIn: https://www.linkedin.com/in/alina-chipaila It is already becoming clear to everyone the substantial impact the COVID-19 Pandemic has had on everyone in the world. One major impact the world has had is on people's learning habits. Online learning took a steep rise in demand replacing the traditional classroom experience.  Online learning has mainly consisted of one-direction webinars with a presenter and participants can ask questions. Another common form is self-paced online learning in which the learners go over pre-recorded learning elements. While both experiences are sound with their advantages in terms of cost-effectiveness and fixability, they both miss the coziness of the small classroom. They miss the small talks that take place between classmates, the ability of classmates to directly help and support each other throughout the learning experience and being able to get in touch with the facilitator for the same. Most importantly, they miss the formation of lasting connections that drive more friendships and more opportunities. This posed the question “how might we bring the positive elements in the cozy classroom to be online?” This led us to develop a new learning experience that is rolling out for one of our in-house subjects, SOLIDWORKS. What does that look like? The New Learning Experience:Our newly designed learning experience is centered around 6 pillars:
Balancing the 6 pillars will both maintain the advantage of flexible online learning and also have the emotional feel of the small cozy classroom experience. A result that can only be made with this unique blended approach. This is all in addition to our well-established excellence in developing high-quality training materials proven during the last 5 years. If you have getting started with SOLIDWORKS in your development plan, you can now sign in to this unique SOLIDWORKS learning experience. Registration closes on Thursday 28th May 2020 and the first cohort will start on June 1st. You can also reach out to us if you are looking for help designing your organization’s learning experiences.  By Tayseer Almattar, TforDesign FounderTayseer is the founder of TforDesign. He has a passion for learning design and making all learning digestible and exciting.
LinkedIn: https://www.linkedin.com/in/tayseer-almattar-design-innovation  In a previous post, we discussed how easy it is to use SOLIDWORKS by demoing creating our first cube. However, SOLIDWORKS also provides much more in terms of functions that our earlier cube might not be the best way to create a cube. Let us explore another way of creating the same 100 millimeter cube in a way a more experienced user might use equations. A major advantage of this approach is its ease of adjustment in a way that keeps our design intention of creating a cube intact. For example, if we decide to adjust the side of the cube from 100 millimeters to 200 millimeters, all we will have to do is to adjust the variable’s value and all three dimensions of the cube will be adjusted as well saving us a lot of time in the iterative design process. Do you often incorporate equations in your modeling process? How do you usually use them? We explore all those inside tips and more in our SOLIDWORKS programs. You can check our advanced professional SOLIDWORKS course for more topics like this.  By Tayseer Almattar, TforDesign FounderTayseer is the founder of TforDesign. He has a passion for learning design and making all learning digestible and exciting.
LinkedIn: https://www.linkedin.com/in/tayseer-almattar-design-innovation A common question that many ask is whether or not one should invest in getting SOLIDWORKS certification from an individual perspective. Here, we will try to break the benefits for you to help you decide if it is worth your time. The certification tests themselves are inexpensive, however, the real cost behind them comes in the form of time invested to get the certificate. This goes in two parts:
 The certification exam also costs money. However, the cost is relatively low ranging between USD 20 – 150 depending on which exam you are looking at. You can find all the exams in the SOLIDWORKS certification catalog. One might ask, “I have learned how to use the software, and the certification does not add anything to my skills. Why take the certificate”. This holds true assuming an individual who is working solely on his/her own. However, for the majority of individuals, they will be working as part of a larger network looking for a job, freelance clients, promotion, etc. In this, getting a SOLIDWORKS certification serves two main advantages for individuals:
To conclude, we cannot say for certain if you should or should not invest in getting official certifications. However, if you decide to, we hope this post will help you identify all the right reasons for doing so. Are you a SOLIDWORKS user already or trying to learn it? Are you also considering getting a certification, what level of certification are you planning for? If you are looking for courses to help support your SOLIDWORKS learning journey, you can check out our online SOLIDWORKS courses.  By Tayseer Almattar, TforDesign FounderTayseer is the founder of TforDesign. He has a passion for learning design and making all learning digestible and exciting.
LinkedIn: https://www.linkedin.com/in/tayseer-almattar-design-innovation  SOLIDWORKS is famed for being very easy to use. This is especially the case if you are starting and only looking for basic models. Let us go ahead and demonstrate this in video by creating our first cube with a side length of 100 millimeters. From the video, we can see how easy it is to get started. Whenever we build a basic model in SOLIDWORKS, we can follow iterate the following three steps:
Those were the steps we followed in the making of the cube. However, don’t make that simplicity fool you as each of the steps can have so much behind them which starts to show as models get more complex. Also, each of the steps can be a world of its own. In the next blog post, we will explore how to make the same cube in a totally different way using Equations which is a relatively advanced function. Sign up to our blog mailing list to get notified about it. Interested in SOLIDWORKS training, you can check out online school HERE.  By Tayseer Almattar, TforDesign FounderTayseer is the founder of TforDesign. He has a passion for learning design and making all learning digestible and exciting.
LinkedIn: https://www.linkedin.com/in/tayseer-almattar-design-innovation |
AuthorThe following blogs are written by TforDesign team and community members. Categories
All
|


 RSS Feed
© 2013 - 2024 TforDesign. All rights reserved.
Terms & Conditions | Privacy Policy | Cookie Policy | Sitemap
Terms & Conditions | Privacy Policy | Cookie Policy | Sitemap